Watercolor is my favorite medium. I started out painting with watercolors when I was in my mid-twenties and have continued with the medium ever since. Occasionally I will try something else but I always gravitate back to watercolors. Painting with watercolor and drawing on it with pen and ink is one of my favorite things to do lately.
Many people are afraid of watercolors. They say it is too difficult to work with. I do not agree. I believe anyone can paint with watercolors. You just need to play with the paints in order to understand how they act in different circumstances. Just like anything you try for the first time, you have to give yourself time to get used to it and develop the skills required. Another bonus, watercolors are easy to clean up.
For students starting out, you need a water container, water, a couple of synthetic brushes of different sizes, watercolor paper, and a watercolor paint set. I use an old yogurt container for my water container. You can find a tablet of inexpensive watercolor paper at most art supplies or office supply stores. As you feel more confident with your watercolor abilities you can upgrade to better quality supplies.
My favorite brand of paint for students is Prang. My second choice is Crayola. You can get an 8 color set for a very reasonable price at most art supply stores for about $5.00. I could spend a whole article on art supplies. If any of you are interested in me talking more about supplies drop me a line.
When starting out with watercolors it helps to know the terminology. I have taught watercolors to adults and students of all ages. I introduce watercolors by demonstrating the different watercolor techniques and familiarizing the student with various watercolor terms.
I do not want to give you too many terms to learn at once, so today I will just give you four. I am including photographs with the terms to help those that need a visual. I am one of those people.
Watercolor Terms:
•Flat Wash – An area that is painted with watercolor so that the value (lightness or darkness) of the color used is even or all the same. A flat wash tends to give no dimension to the painting and appears flat.
Overlap brushstrokes.
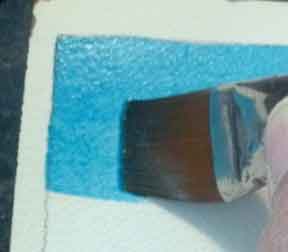
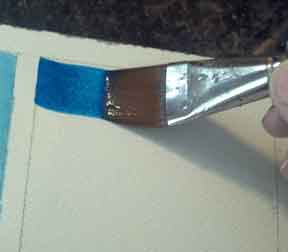
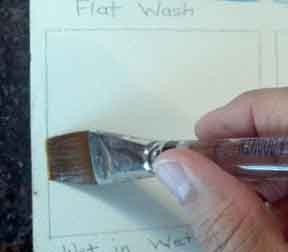
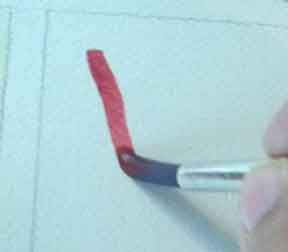
When painting a flat wash you need a large puddle of paint that you can go back to when your brush needs more paint. I usually tilt my paper so that it is higher at the top. The photo of the tilted paper is from the side and closer to the top. I used a small box of Jello to tilt my paper. Use whatever is handy for you. Tilting the paper helps the paint flow downward. You can use a flat or round brush. I used a flat.
I started at the top of my paper and drew the brush across the full width that I want painted. If needed, I went back to get more paint. When I made my next brushstroke I made sure the second stroke overlapped the first. That way the paint combines and blends together. You only need to go back for more paint if your brush seems to be getting dry and you notice the paint is lighter.
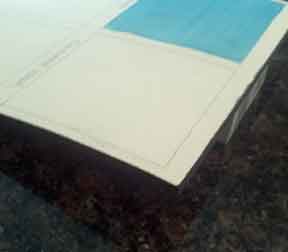
Tilting the paper with something under the top helps paint flow.
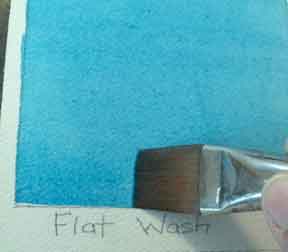
The finished flat wash.
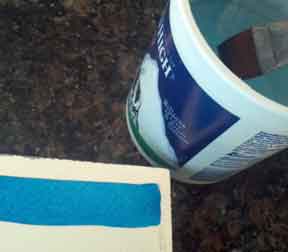
•Graded Wash – An area that is painted so that the value of the paint changes. Most sky paintings use a graded wash with the sky being dark at the top and getting lighter at the horizon. This is done by adding water to the brush as you move down the page. You may want to make sure that your paint is darker at the top by using more paint and less water.
Graded wash starts of pretty much like the flat.
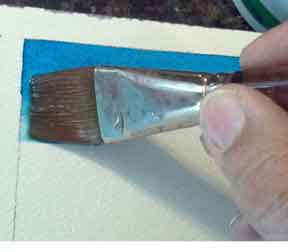
Overlap the brushstrokes in graded wash just like the flat.
Get water for your brush to make the value of the paint get lighter as you move down the paper.
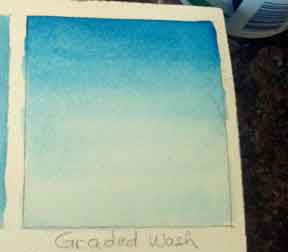
Notice how the graded wash is darker at the top and gradually lightens as it moves downward.
•Wet in Wet: This technique is quite fun because you never know what you are going to get. There is always a surprise involved. With wet in wet you are painting with a wet paintbrush on wet paper.
To do this technique, paint an area of your paper with clean water.
Use clean water to wet the paper.
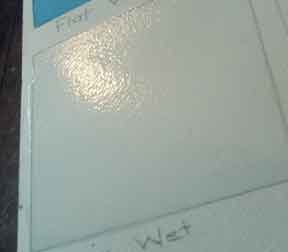
Paper looks shiny when wet.
While the paper is wet, fill your brush with paint and touch the paintbrush to the wet paper.
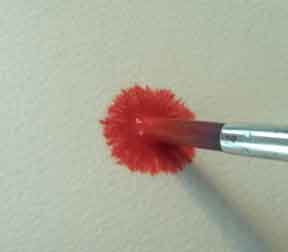
Touch wet paintbrush filled with paint to paper.
The paint will go wherever it wants to. You have no control. This technique gives a very blurred, fuzzy, or soft appearance to the painting.
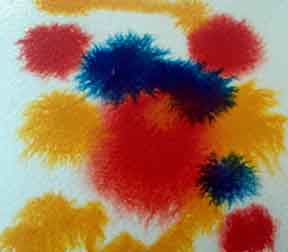
Wet in wet produces fuzzy edges.
•Wet in Dry – With this technique the artist paints with a wet brush on dry paper. You have control of the paint and will end up with a hard edge. The paint stays where you put it. This technique works unless you get carried away and touch one wet area to another wet area.
With wet in dry you have control of the paint.
The photograph below shows the four techniques that I have been talking about today. Notice how they are different. Practicing these techniques will give you a better feel of the medium. You may even start to see how you can purposely use the way watercolor acts in different circumstances to your benefit.
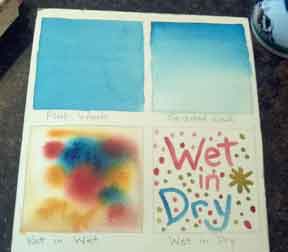
All Four Techniques
There are many other watercolor techniques to learn. I will be back with more at a later date. In the meantime, I would like to wish each of you a very Merry Christmas. I pray you will all be healthy, safe, and happy as you celebrate Christ’s birth. Thank you for stopping by and reading my blog. You are appreciated. Merry Christmas!!!!! Happy Painting too!!!