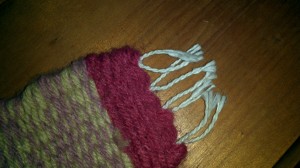
Weaving a small bookmark is a fun and interesting project that your homeschool students may enjoy. You may even have most of the supplies needed at home already.
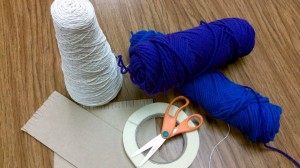
Supplies needed are:
- a cardboard loom,
- a large plastic needle,
- scissors,
- string or yarn,
- and masking tape.
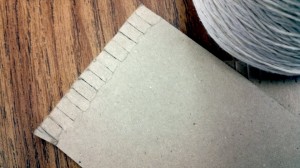
If you do not have a cardboard loom, you can make one. The loom is just a piece of sturdy cardboard with notches every 1/4 inch cut into both ends. The notches are approximately 1/2 inch deep. Here is a closer look.
There are several weaving videos on You Tube that explain how to create the woven bookmark as well as show examples of weaving techniques. The following video was made by an art teacher for his students. I suggest viewing it before starting your weaving project. Weaving Video.
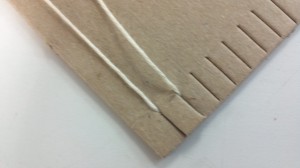
The first step in creating a woven bookmark is warping the loom. You can use string or yarn. You need to put the end of the yarn or string in the end notch of your loom. Tape about one inch of the string to the back of the cardboard to hold it in place. Then you will pull the string or yarn across the front of the loom to the opposite first notch. The next step is tricky. You want your string on the front of the loom only. Remember that. If you see any string on the back you need to stop and fix it.
Take the string and go from the first notch to the second notch on the same side of the loom Here is a photo to help explain.
Make sure that your weaving has an even number of strings. For the bookmarks that my students made they used ten strings. When you get the correct number of strings, tape the string end to the back of the loom and cut.
I suggest that you do not weave in the top or bottom 1 and 1/2 inches of the loom. That length of string will become fringe on your bookmark when you remove it from the loom.
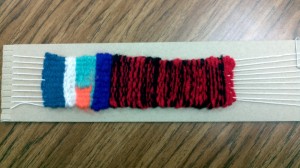
The easiest weaving technique is called tabby. In using the Tabby technique you take the yarn and needle over, under, over, under through the warp strings on the loom. Begin with that technique. You can use that technique throughout the weaving or you can use others called interlocking, supplementary, Egyptian knot, dovetail, rya, or slit. Watch the video mentioned above to see some of these other techniques if you haven’t already. Weaving Video.
When you have made the bookmark the size that you wish, Hide the end of your yarn by weaving it inside the last woven row. Clip with scissors.
Then it is time to take the weaving off the loom. You do this by cutting the first two strings that are closest to the edge of the bookmark. Cut them right at the end of the loom. You want to be sure you can tie the strings into a knot. If you cut them too short it will be difficult to tie. Tie the two strings into a double knot so that the knot is snug against the weaving. Then cut the next two strings. Tie them. Do this until one side is off the loom. Then move to the next side. Tie each pair of strings. When you have finished tying the strings you will have completed your weaving. Trim any strings that may need it. Enjoy your bookmark!

