I asked my Art III students to create a self-portrait with words again this year because I loved the results and the students enjoyed the project. Since all my students had already done a word self-portrait, I wanted to change things up and make the assignment a little more interesting and challenging. If you missed the article about Self-Portraits With Words you can click on the link and get caught up.
To start the project I asked each student to make a list of words describing themselves. Then they were asked to pass their paper around the classroom for others to add to their list of descriptive terms. Only positive terms were allowed.
Once the papers were returned to their owners, each student circled their favorite five words and placed a #1 on their favorite. These five words would be used in the self-portraits.
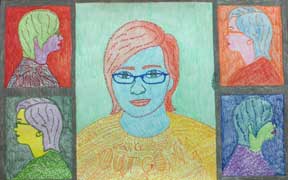
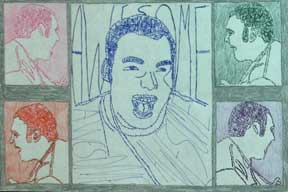
This year I took photographs of each students from three sides. I took a front view and a profile from the left and the right. I printed out the front facing photo in an 8″ x 10″ format. The profile pictures were printed in a 5″ x 7″ format. The students used a light box or classroom window to trace their outlines in the photos onto computer paper with a black marker.
Once the photos were traced it was time to figure out the placement of the drawings on the page. They were given a 12″ x 18″ paper for the finished work of art. I told them to center the large tracing of their picture on the page vertically and horizontally. This took a while as I let the students figure it out, measuring their page to get the placement correct. They drew an 8″ x 10″ box on the large paper with one inch of empty space above and below.
Then the students arranged the smaller photo tracings on each side of the large one. The left and right profiles were placed in a staggered manner on each side. One profile looked into the picture plane and the other looked out of the picture plane. I felt this would create more interest.
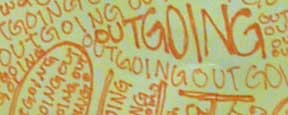
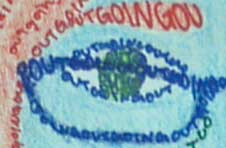
Once the spacing and planning was done the students began creating their self-portraits with words. Students used their favorite descriptive word to create the large portrait. This year they used fine pointed colored pens instead of pencil. Using the tracing underneath, they wrote their favorite word along the lines of their face, hair, clothes, eyes, etc. Only one word could be used per portrait.
The smaller portraits were created from the other four descriptive words they had chosen. Some students tried to really change up the size and shape of their letters to fill in certain areas. Larger words were used in the background.
When all the portraits were done the students added color with colored pencil. They colored or created designs in the empty space around the portraits which then made the area a frame.
This project is great fun and can be repeated each year as your child grows. Use your imagination to make changes or additions to the assignment in order to make it more your own. You could even enlarge the photo size and end up with a poster word portrait. If you try this assignment let me know how it goes.


